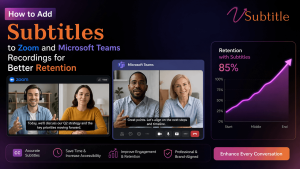
If you’ve ever rewatched a Zoom meeting recording or a Teams call at 1.5x speed with the sound half-muted in a shared office, you already know the problem: people don’t actually watch recordings, they skim them. And when they skim, they miss things. Subtitles fix that. They turn a passive recording into a scannable, searchable, retainable piece of content that works whether someone is watching with sound on, sound off, in a noisy commute, or in a completely different language.
In this guide, we’ll walk through exactly how to add subtitles to Zoom and Microsoft Teams recordings, why captions have such a measurable impact on retention and comprehension, and how a dedicated tool like vSubtitle can turn a manual, hour-long chore into a five-minute upload.
Why Subtitles Improve Retention for Meeting Recordings
Before jumping into the how-to, it’s worth understanding why this small addition makes such a big difference.
- Dual coding boosts memory. When viewers both hear and read information at the same time, they encode it through two channels instead of one. Research on multimedia learning consistently shows that pairing audio with synchronized text improves comprehension and recall compared to audio alone.
- Most recordings are watched without sound. A large share of workplace video is viewed on mute — in open offices, on phones during commutes, or in shared spaces. Without subtitles, that content is effectively invisible.
- Captions make recordings searchable and skimmable. A captioned recording can be scanned like a transcript, letting viewers jump straight to the ten minutes that matter instead of sitting through a sixty-minute call.
- They remove language and accessibility barriers. Global teams, non-native speakers, and viewers who are deaf or hard of hearing all retain more when accurate captions are available.
- They reduce cognitive load in noisy audio conditions. Meeting audio is rarely studio quality — crosstalk, bad microphones, and connection issues are common. Text acts as a safety net when audio drops out.
How to Add Subtitles to Zoom Recordings
Zoom offers a couple of native options, plus the option to bring in a dedicated captioning tool for better accuracy and editing control.
Option 1: Zoom’s Built-In Cloud Recording Captions
If you’re on a Zoom plan with cloud recording, Zoom can generate automatic transcripts and captions for recordings stored in the cloud.
- Sign in to your Zoom web portal and go to Settings.
- Under the Recording tab, find Cloud Recording and enable “Audio transcript” and “Save closed caption as a VTT file.”
- Record your meeting to the cloud as usual.
- Once processing finishes, open the recording from Recordings in the web portal.
- Zoom will generate a transcript alongside the video, and you can toggle captions on for playback or download the VTT file for editing.
This works well for basic needs, but Zoom’s auto-generated captions can struggle with technical vocabulary, accents, overlapping speakers, and non-English audio — and editing them inside Zoom’s interface is limited.
Option 2: Export the Recording and Add Subtitles with an AI Tool
For meetings where accuracy actually matters — sales calls, training sessions, webinars, all-hands recordings — exporting the video and running it through a dedicated captioning tool like vSubtitle gives you far more control.
- Download the local or cloud recording as an MP4 file from Zoom.
- Upload the file to vsubtitle.com — the platform accepts standard video formats and processes them through its AI transcription engine.
- Select your target language(s). vSubtitle supports caption generation and translation across 100+ languages, which is useful if your recording needs to reach international teams or customers.
- Let the AI process the audio. vSubtitle is built for speed, so an hour-long recording is typically captioned in minutes rather than the real-time or slower processing common with manual transcription.
- Review and fine-tune the captions in the built-in editor — adjust timing, fix names or jargon the AI may have misheard, and style the subtitle appearance if you plan to burn captions into the video.
- Export in the format you need: SRT, VTT, or JSON for uploading alongside the video, or an embedded version if you want captions baked directly into the file.
This approach is especially useful for recordings that will live permanently on a shared drive, LMS, or public webpage, where relying on Zoom’s native (and sometimes temporary) transcript isn’t reliable enough.
How to Add Subtitles to Microsoft Teams Recordings
Microsoft Teams has similarly evolved its native captioning, but the workflow and reliability differ depending on where the recording is stored and how it’s shared.
Option 1: Live Captions During the Meeting
Teams allows live captions to be turned on during a call, which some organizations use as a starting point.
- During the meeting, click More options (the three dots) in the meeting toolbar.
- Select “Language and speech,” then “Turn on live captions.”
- Captions will appear in real time for participants, and if the meeting is recorded, Teams can generate a transcript that syncs with the recording afterward.
This is helpful for real-time accessibility during the call itself, but live captions are not the same as a polished, edited subtitle file — they’re generated on the fly and often contain errors that go uncorrected.
Option 2: Teams/Stream Recording Transcripts
Recordings saved to Microsoft Stream (or OneDrive/SharePoint, depending on your organization’s setup) typically come with an auto-generated transcript.
- Open the recording from the Teams chat, channel, or OneDrive/SharePoint location.
- Look for the transcript panel alongside the video player.
- Enable captions for playback, or download the transcript file if editing access is available.
As with Zoom, the accuracy of Microsoft’s automatic transcript depends heavily on audio quality, accents, and technical terminology — and downstream editing tools are limited.
Option 3: Use vSubtitle for Polished, Editable Teams Captions
For recordings you plan to repurpose — internal training libraries, customer-facing demos, onboarding content — running the exported Teams recording through vSubtitle gives you a consistent, high-accuracy result regardless of where the meeting was hosted.
- Download the Teams recording as an MP4 from the chat, channel, or SharePoint/OneDrive location.
- Upload it to vSubtitle and let the AI generate captions, delivering up to 97.8% accuracy on clear audio.
- Use the collaborative editor to review captions as a team — vSubtitle supports review workflows and real-time collaborative editing, which is useful when a training or compliance team needs to sign off before publishing.
- Translate the captions into additional languages if the recording will be shared with global offices or customers.
- Export as SRT, VTT, or an embedded video, then upload the finished file wherever it will actually be watched — an LMS, intranet, or shared drive.
Best Practices for Subtitles That Actually Improve Retention
Adding captions is only half the job. How they’re formatted and used matters just as much for whether viewers actually retain the information.
- Keep captions short and well-timed. Long, dense caption blocks are harder to read at speaking pace. Aim for one to two lines displayed at a time, synced closely to the audio.
- Fix names, acronyms, and product terms manually. AI transcription is fast but can misread specialized vocabulary — a quick manual pass on jargon-heavy recordings pays off.
- Provide a downloadable transcript alongside captions. Some viewers prefer to read the full transcript rather than watch the video, especially for long meetings.
- Translate for your actual audience, not just “international.” If most of your external viewers are in a specific region, prioritize that language first rather than defaulting only to English captions.
- Burn in captions for social or public clips, keep them as separate files for internal recordings. Embedded captions guarantee visibility on platforms with unreliable native caption support; separate SRT/VTT files keep internal recordings flexible and editable.
- Test playback without sound. Before distributing a recording widely, watch a minute of it muted to confirm the captions alone convey the key message.
Why Use a Dedicated Tool Instead of Native Captions Alone
Zoom and Teams both offer decent starting points, but their native captioning tools are built for real-time accessibility during a live call, not for producing a clean, reusable subtitle asset afterward. A dedicated AI subtitling platform like vSubtitle closes that gap by combining speed, accuracy, and an editor built specifically for refining captions before they go out to a wider audience.
- Accuracy: Neural network-based transcription tuned for accuracy, rather than a lightweight real-time engine optimized for low latency.
- Speed: Processes hours of video in minutes, which matters when you’re captioning a backlog of past recordings, not just one call.
- Language coverage: Supports 100+ languages and dialects with cultural context awareness, useful for global teams and customer-facing content.
- Format flexibility: Exports to SRT, VTT, JSON, or embeds captions directly into the video file.
- Collaboration: Team review workflows mean a manager, trainer, or localization reviewer can sign off before a recording is published.
Frequently Asked Questions
Can I add subtitles to a Zoom recording after the meeting has ended?
Yes. You don’t need to enable captions during the live meeting to caption the recording afterward. Export the recording as a video file and upload it to a captioning tool like vSubtitle, which will generate subtitles from the recorded audio regardless of whether live captions were used during the call.
Do Zoom and Teams captions work for recordings that aren’t in English?
Native captioning in Zoom and Teams supports a limited set of languages and can vary in accuracy for non-English audio. A dedicated tool that supports 100+ languages, such as vSubtitle, generally offers broader and more consistent language coverage, along with translation options for reaching audiences beyond the original recording language.
Why do auto-generated captions sometimes get names or technical terms wrong?
Automatic speech recognition is trained on general language patterns, so uncommon names, acronyms, and industry-specific jargon are the most common source of errors. This is true across Zoom, Teams, and most AI captioning tools. The fix is a quick manual review pass in an editor before publishing, which is why an editable caption workflow matters more than raw accuracy alone.
What’s the difference between a transcript and subtitles?
A transcript is a full text record of everything said, without timing information tied to the video playback. Subtitles (or captions) are timed text segments synced to specific moments in the video, so viewers can read along in real time. Recordings benefit most from having both: subtitles for playback and a transcript for skimming or searching.
Should I burn subtitles directly into the video or keep them as a separate file?
It depends on where the recording will be watched. Burned-in (embedded) captions guarantee visibility on any platform, including ones with weak native caption support, which makes them useful for social clips or public-facing content. Separate SRT or VTT files are better for internal recordings, since they can be turned on or off, edited later, and translated without re-rendering the video.
How long does it take to caption a one-hour meeting recording?
Manually transcribing and timing captions for an hour of audio can take several hours by hand. AI-based tools significantly cut that down — platforms like vSubtitle are designed to process hours of video in minutes, after which a shorter manual review pass is usually enough to catch any misheard names or terms.
Do subtitles actually improve retention, or is that just a marketing claim?
Studies on multimedia learning consistently find that combining audio with synchronized on-screen text improves comprehension and recall compared to audio alone, since viewers process the information through both visual and auditory channels. In a workplace context, this is reinforced by the simple fact that captioned recordings can be watched on mute, skimmed for key points, and revisited more easily than audio-only content.
Can vSubtitle handle both Zoom and Microsoft Teams recordings?
Yes. vSubtitle works with standard exported video files, so it doesn’t matter whether the recording originated in Zoom, Microsoft Teams, or another platform — you simply upload the MP4 (or other supported format) and the AI generates captions, transcripts, and translations from there.
Final Thoughts
Native captions in Zoom and Teams are a reasonable starting point for live accessibility, but they’re rarely the best long-term solution for recordings you plan to reuse, share externally, or repurpose across teams and languages. Exporting your recording and running it through a dedicated AI captioning platform gives you higher accuracy, an editor to fix the details, automatic transcription misses, and translation options that native tools don’t offer.
If better retention, accessibility, and reach are the goal, pairing your Zoom or Teams workflow with vSubtitle turns every recording into content people can actually watch, read, search, and remember — no matter where or how they’re watching it.